Speeding up STAR-CCM+: Difference between revisions
Created page with "== Speedup Capability == Beginning in June 2011, the capability exists to run the STAR-CCM+ GUI (client) on a local Windows workstation and to connect to a server running on..." |
|||
| Line 48: | Line 48: | ||
[[File:Install-star1.png|center]] | [[File:180px-Install-star1.png|center]] | ||
| Line 78: | Line 78: | ||
Respond to the query above with: Allow access. | Respond to the query above with: Allow access. | ||
===Install WinSCP (skip if WinSCP is already installed)=== | ===Install WinSCP (skip if WinSCP is already installed)=== | ||
Revision as of 21:08, March 4, 2021
Speedup Capability
Beginning in June 2011, the capability exists to run the STAR-CCM+ GUI (client) on a local Windows workstation and to connect to a server running on the TRACC cluster. CD-adapco implemented modifications to make this capability possible in a recent release and members of the TRACC team have successfully executed the needed software installation, setup, and procedures using a local Windows 7 Enterprise 64-bit system.
The response time in the user interface is far faster than the response time when using NoMachine NX to access the user interface through a remote desktop session because geometry rendering and window redraws are done by the local accelerated graphics card, if an accelerated graphics card is present, which is usually the case for modern computers. Even if the local graphics card is not a high end card, speed up in the response when using the GUI is large.
The speed up may not be as significant if sending compressed rendered graphics over the internet is not the bottleneck slowing the response. This may be the case when the model is very large (more than 10 million computational cells). For very large models running on many compute nodes, some experimentation will be necessary to determine if connecting a STAR-CCM+ client from a local machine to a very large job on the cluster provides significant speed up in the user interface.
Running the STAR-CCM+ client on a local machine and connecting to a server on the TRACC cluster host requires the generation of a public-private key pair for authentication when connecting to the TRACC cluster because the connection process does not have an option to use password authentication when connecting. Your private key must be passphrase protected. You will need to type in the passphrase when you start the agent software that accesses the private key during the authentication process.
Note the usage of the following terms.
- username
- substitute your username
- password
- the password which you set for your username at credentials.anl.gov
- passphrase
- use a strong passphrase that meets the same criteria as the one you use for your Argonne collaborator account
- loginnode
- For the Phoenix cluster, either l01, l02, l03, or login.phoenix.tracc.anl.gov which will resolve to login1.phoenix.tracc.anl.gov, login2.phoenix.tracc.anl.gov, or login3.phoenix.tracc.anl.gov depending on load. For Zephyr, it is login.zephyr.tracc.anl.gov which resolves to login1.zephyr.tracc.anl.gov or login2.zephyr.tracc.anl.gov
- computenode
- lower case n followed by a number between 000 and 128
- portnumber
- choose a number in the 40000-50000 range so that it is unique on the system.
Installations
Administrator privileges on your local machine will be needed for several of the steps below. If needed, arrange for an IT administrator to install the software and complete the setup procedures at your facility.
Install STAR-CCM+
- Create a folder named CD-adapco on your local machine and copy your license file into that folder.
- If you do have a local STAR-CCM+ software license, you can work both locally and by connecting to a STAR-CCM+ job on the cluster. If you are installing to use only the STAR-CCM+ client to connect to a server on the TRACC cluster, you will not have a license file, and may get some error messages during the installation. Ignore them and proceed to complete the installation.
- The client and server parts of the software are not separate. You must download and install the whole thing. Note that the user interface (client) will start up but that nothing can be done with it until it is connected to a STAR-CCM+ server process on the TRACC cluster.
- Download the latest version of STAR-CCM+ from the TRACC cluster into the local CD-adapco folder.
- As of this writing, the version is 6.04.014. Verify this number is still correct. If not correct, then modify the use of '6.04.014' on this page to the latest version.
- The STAR-CCM+ software packages for Windows can be found on the cluster in directory
- /mnt/gpfs/soft/cd-adapco/downloads/
- The file is
- STAR-CCM+_CadSeries6.04.014_12_win64.zip
- Extract the contents of the zip file into a subfolder of the CD-adapco folder.
- Run (double click) the executable file
- STAR-CCM+_CadSeries6.04.014_win64_intel11.1.exe
- Check ( * ) I acknowledge acceptance of this Notice
- Click the Next button.
- The system may not respond or change for a while and appear to be hung. Do not click the Next button multiple times. If the screen that finally appears is not the Choose Installation Method screen you must click the Previous button until you can choose the Custom (Advanced) installation method.
- Click Next.
- Continue by following the installation screens as shown below.
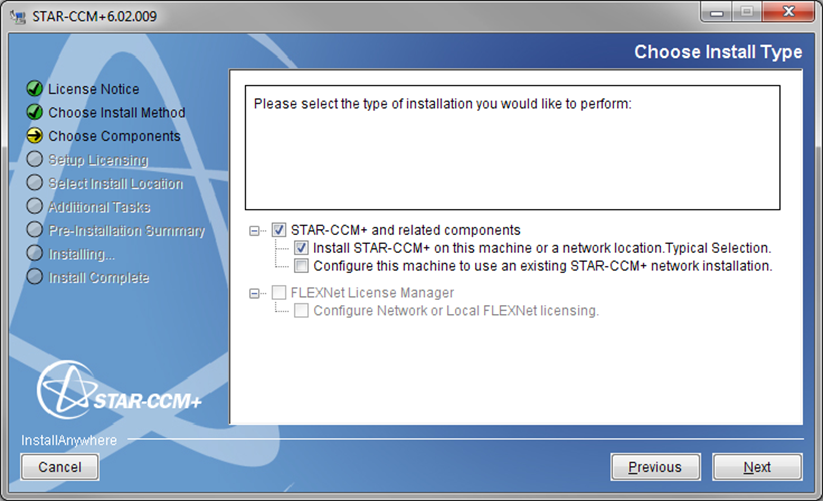
Note that the FLEXNet License Manager is not needed to use the STAR-CCM+ client to connect to a STAR-CCM+ session or job (the server) on a remote machine (the TRACC cluster).
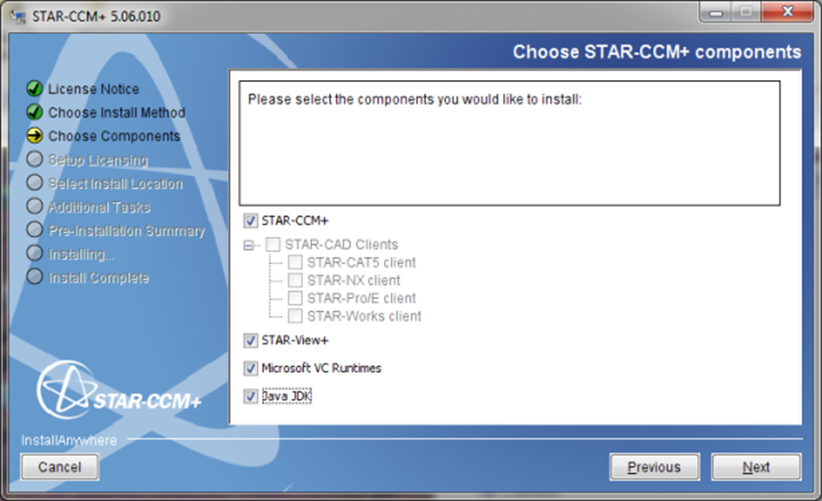
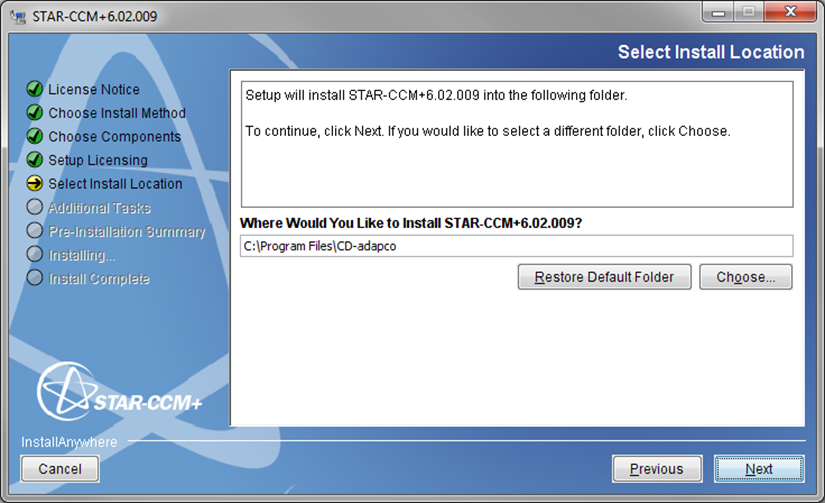
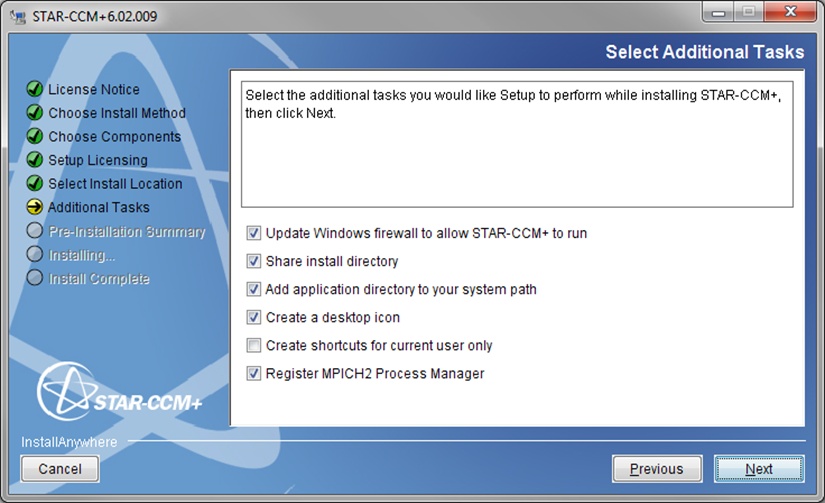
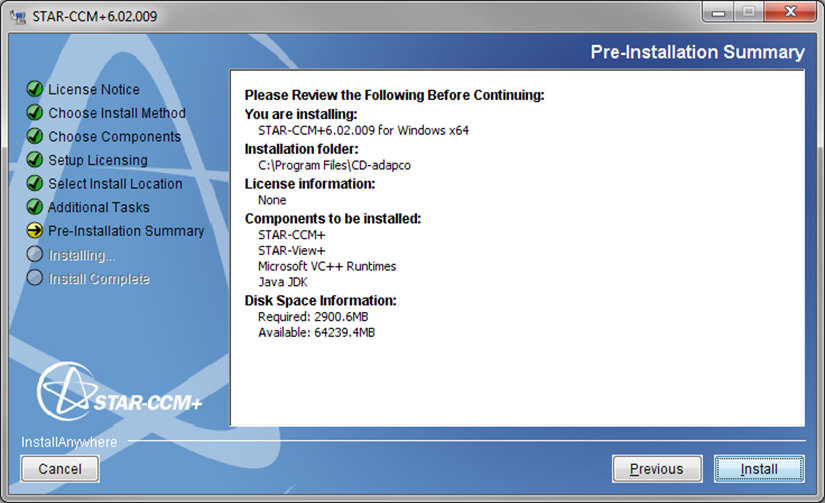
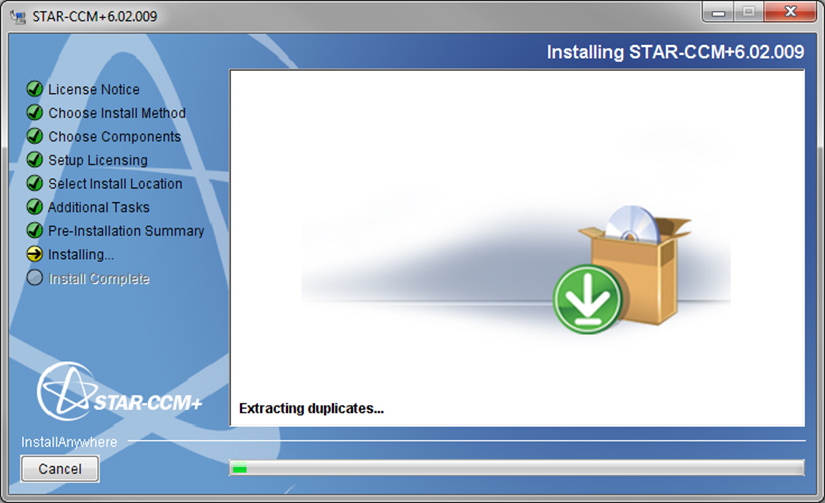
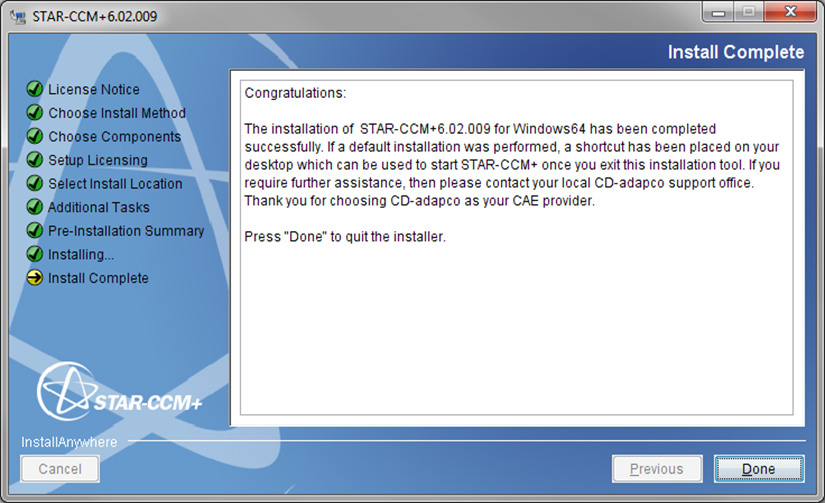
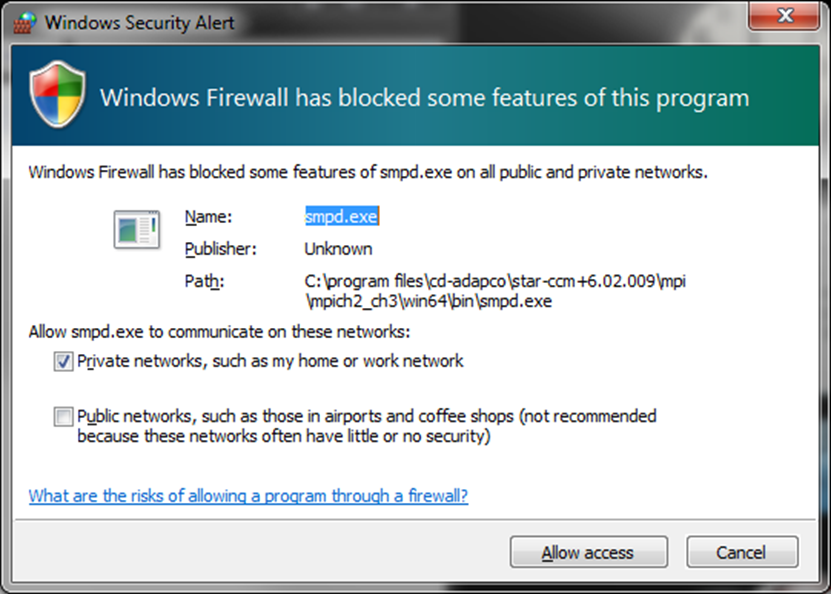
Respond to the query above with: Allow access.
Install WinSCP (skip if WinSCP is already installed)
- Browse to www.download.com and search for WinSCP (version as of June 2011 is 4.3.2)
- Download Now > Save File
- Install and reboot
Install NX Client for Windows (skip if NoMachine is already installed)
- Browse to www.nomachine.com and select the Download tab.
- Scroll down to “NX Client for Windows” and download and install the following:
- nxclient-3.4.0-10.exe
- nxfonts-75dpi-3.4.0-1.exe
- nxfonts-100dpi-3.4.0-1.exe
- nxfonts-misc-3.4.0-1.exe
- nxfonts-others-3.4.0-1.exe
Install PuTTY (skip if PuTTY is already installed)
- Browse to www.putty.org and follow the "download PuTTY here" link.
- Download the "Windows installer for everything except PuTTYtel" and install.
Create an “ssh” command that will work in a Windows command prompt window
- Copy plink.exe from the PuTTY installation folder (C:\Program Files (x86)\PuTTY) to C:\Windows\system32 and rename it to ssh.exe. Note that it can be put anywhere that is on the path.
Procedure to set up RSA key authentication to connect STAR-CCM+ to a remote server
Generate and set up ssh keys to allow communication between your local PC and the compute nodes
Using PuTTY, login to the TRACC cluster
- Start > All Programs > PuTTY > PuTTY
- Session.Host Name [ login.phoenix.tracc.anl.gov or login.zephyr.tracc.anl.gov]
- Connection.Data.Auto-login username [ username ]
- Select Open and select Yes to any query about adding host keys to the cache.
- Enter your password and you will be logged into a login node (note login node name) where you can perform the following steps:
- [username@loginnode ~]$ ssh-keygen -t rsa -b 2048
- Generating public/private rsa key pair.
- Enter file in which to save the key (/home /username/.ssh/id_rsa):
- Enter passphrase. Read this carefully ! ! !
- For your safety and ours you MUST enter a sufficiently secure passphrase.
- Anyone found with a weak passphrase will have their account suspended!
- Go to https://credentials.anl.gov to find how to create strong passwords.
- Append the public key to the authorized_keys2 file with the following command:
- [username@ loginnode ~]$ cd .ssh
- [username@ loginnode ~]$ cat id_rsa.pub >> authorized_keys2
Permissions:
The permissions for the .ssh directory need to be set to 700.
- chmod 700 .ssh
The permissions for the authorized_keys2 file need to be set to 600.
- chmod 600 authorized_keys2
Move generated keys to your local machine
Move id_rsa and id_rsa.pub from /mnt/gpfs/home/username/.ssh to C:\Users\username\.ssh
- For security reasons you should Move the files rather than Copy them, or copy them and then delete them from the TRACC cluster after a successful copy.
- Start > All Programs > WinSCP > WinSCP to Launch WinSCP
- Host name: login.phoenix.tracc.anl.gov or login.zephyr.tracc.anl.gov
- User name: username
- Password: password
- Login > Select Yes to any query about adding host keys to the cache.
- In the left pane go up one directory level and select Files > New > Directory... to create the folder named .ssh if it does not already exist.
- In the right pane double click on the .ssh directory to view its contents.
- Select id_rsa and shift click on id_rsa.pub to select both files
- Right mouse on one of them and select Move...
- Browse to the local .ssh folder (C:\Users\username'\.ssh\*.*) and select Move. This will delete both files from the login node.
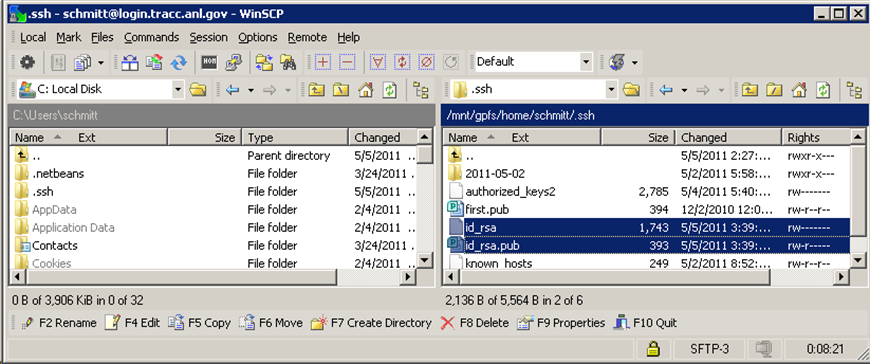
Convert the private key to the format required by PuTTY.
- From your local machine select Start > All Programs > PuTTY > PuTTYgen
- Select Conversions > Import key
- Browse to the private key (C:\Users\username\.ssh\id_rsa) and select Open
- Enter your passphrase and make any changes you want to Key comment
- Select Save private key and choose id_rsa.ppk as the filename in the current directory, (C:\Users\username\.ssh)
Set up the password authentication agent Pagent.
- Start > All Programs > Putty > Pagent (puts Pagent in the taskbar).
- Double click on the icon, select Add Key and browse to the directory containing the file id_rsa.ppk
- Select it, click Open and provide your passphrase and your key should appear in the list.
- Note!. It is necessary to have Pagent in the taskbar with your key in the list every time you want to connect the STAR-CCM+ client on your local machine to a STAR-CCM+ server on the cluster.
Test to Verify Connection of Local STAR-CCM+ to Remote Server
Login to a cluster login node with the NX Client.
First time:
- Start > All Programs > NX Client for Windows > NX Connection Wizard
- Take all defaults except the following:
- Session: TRACC Login node
- Host: login.phoenix.tracc.anl.gov or login.zephyr.tracc.anl.gov
- [ * ] Create shortcut on desktop
- Finish >
- Password: password, then select Login and Yes to continue.
Subsequently:
- Double click the desktop shortcut
Grab a compute node
- Right Mouse on the desktop and select Konsole... and proceed as follows:
- [username@ loginnode username]$ qsub -I -X -l walltime=24:0:0,nodes=1:ppn=8
- (Read as: qsub – uppercase India – uppercase X-Ray – lowercase Lima . . .)
- Once you have been assigned to a compute node you should see the following prompt:
- [username@computenode ~]$
Start a STAR-CCM+ server on a compute node. Do not run the STAR-CCM+ server on a login node!
Launch STAR-CCM+ with the following commands:
- [username@ computenode ~]$ module load star-ccm+/6.04.014
- [username@ computenode ~]$ starccm+ &
The STAR-CCM+ Gui should appear
Load a simulation file as follows:
- File > Load Simulation... >
- ( * ) Parallel
- ( * ) Run all processes on local host
- Compute Processes [ 4]
- Browse... [ [email protected] ]
- File [ /mnt/gpfs/home/username/cd-adapco/[email protected] ] > Open
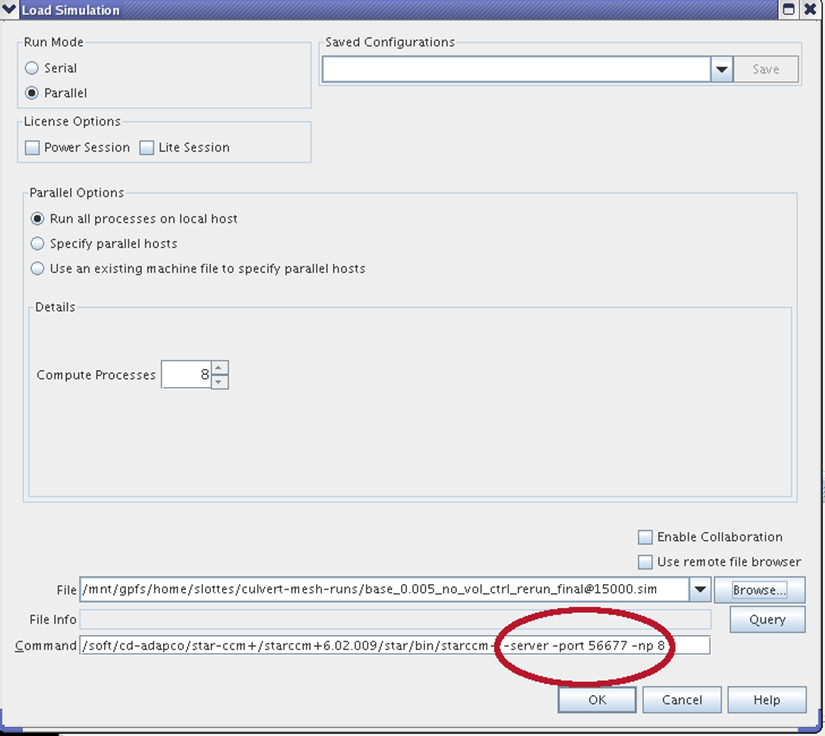
At this point you must add an usused port number into the Command line text box and select OK Command [ /soft/cd-adapco/star-ccm+/starccm+6.04.014/star/bin/starccm+ -server -port portnumber -np 4 ]
A random port number should be selected. If the port that is selected is already in use, by some other user for example, an error indicating that the port is in use will appear when attempting to connect STAR-CCM+ from a remote location to the server. CD-adapco advised that collisions of this type are rare, as long as you do not use the default port. As an example, port number 56677 is added to the command line for starting STAR-CCM+ below (you should make up your own port number to use):
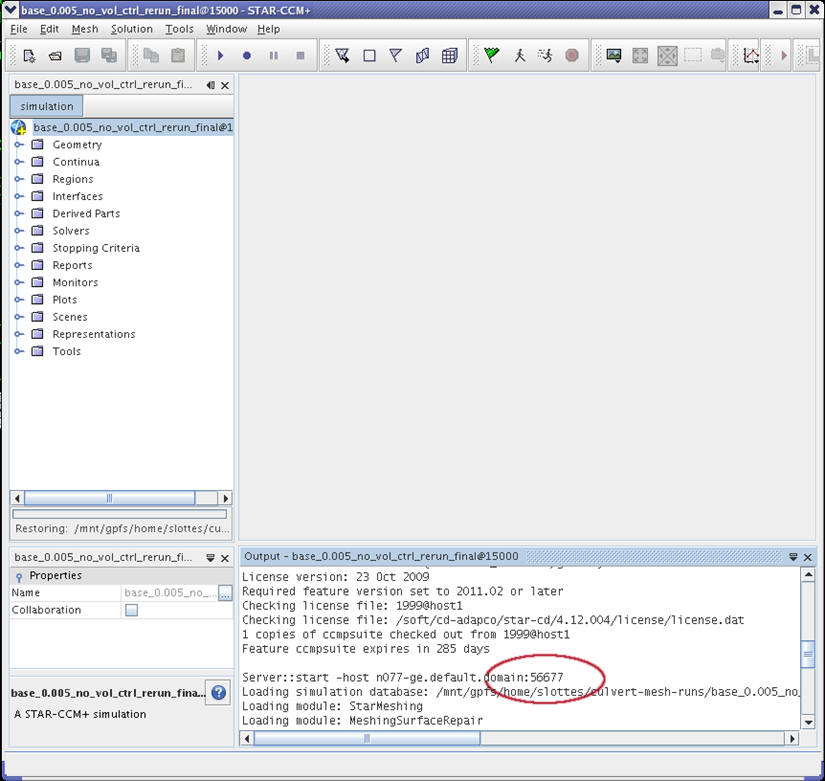
Note in the messages that are generated in the Output panel when the STAR-CCM+ server starts that the port number that it is using is given as shown in the figure below. You might have to scroll up to find the “Server::start” line in the output.
Launch STAR-CCM+ on your local PC.
- Start > All Programs > CD-adapco > STAR-CCM+6.04.014 for Windows 64
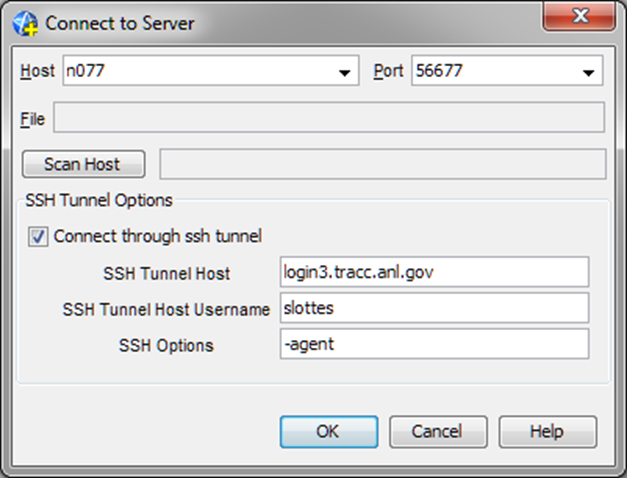
- File > Connect to server... > Host [ computenode ] Port [ portnumber ]
- [ * ] connect through ssh tunnel
- SSH Tunnel Host [loginnode ]
- SSH Tunnel Host Username [ username ]
- SSH Options [ -agent ]
- Note: you must delete other text in the SSH options box; it should contain only “-agent”
The connect to server dialog box should look similar to:
If your server's host key is not cached in the registry you will see the following window:
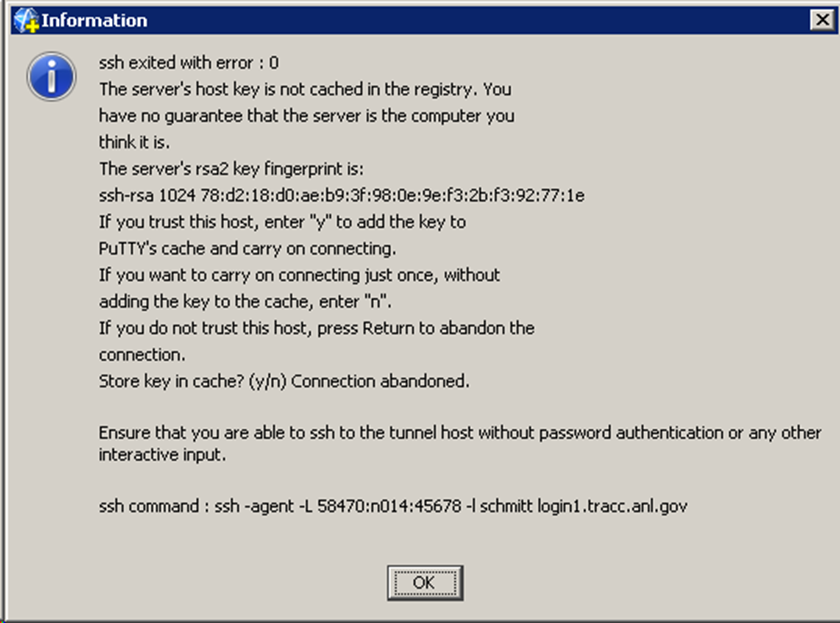
One way around this is to bring up a command prompt and type the above ssh command and enter "y" when appropriate.
Alternatively launch PuTTY on your PC, select Default Settings, then select Load. Make the following changes:
- Session.Host Name: loginnode
- Connection.Data.Auto-login username: username
Select Open and then Yes to the PuTTY Security Alert.
You should now be able to run the STAR-CCM+ client (user interface) on your local desktop and experience greatly improved responsiveness!
Disconnecting from the server session
From the local machine client session select File > Disconnect > OK to disconnect from the server process. You can then reconnect later, even from a different location (home versus work).
Summary of procedure to connect to a remote STAR-CCM+ job after key authentication is setup
- If Pagent is not running: start Pagent, add the private key, and enter the passphrase when prompted.
- Start STAR-CCM+
- Go to File > connect to server
- Enter the computenode in the host text box, the port used to start STAR-CCM+ in the port text box, check “Connect through ssh tunnel,” the loginnode in the SSH Tunnel Host text box, your username in the SSH Tunnel Host Username text box, and “-agent” as the only text in the SSH Options text box.
- Click O.K.
| TRACC Home | Back to STAR-CCM+ | Back to Application Notes |