Email Services/Zimbra User Documentation/Thunderbird: Difference between revisions
Jump to navigation
Jump to search
(New page: == Add Your Account == # After starting Thunderbird, choose the following from the menu:<br>'''Edit -> Account Settings...'''<br><br> # You will then see a dialog box that looks something ...) |
m (Lehman moved page CIS Email Services/Zimbra User Documentation/Thunderbird to Email Services/Zimbra User Documentation/Thunderbird) |
(No difference)
| |
Latest revision as of 15:44, November 2, 2017
Add Your Account
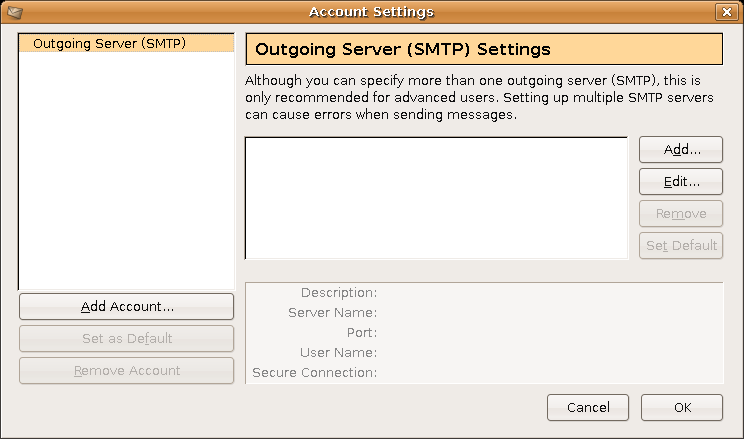
- After starting Thunderbird, choose the following from the menu:
Edit -> Account Settings... - You will then see a dialog box that looks something like this. Click on Add Account...
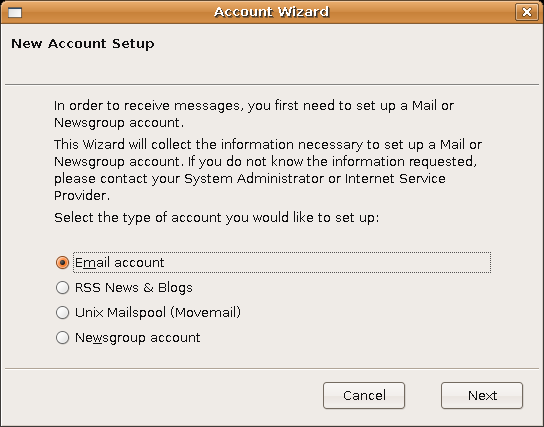
- Select Email account and choose Next.
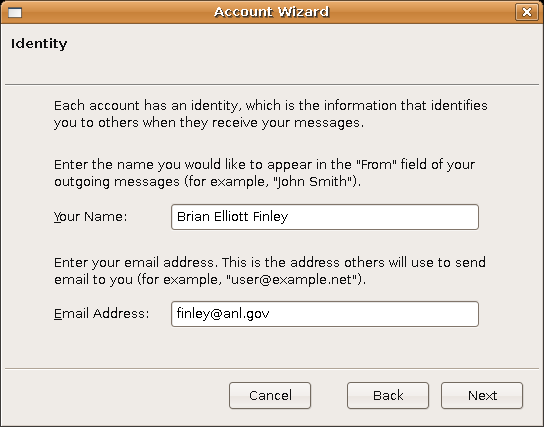
- Enter your name, and your reply to address, then choose Next. In this case, email sent to [email protected] will be forwarded to Brian's [email protected] account.
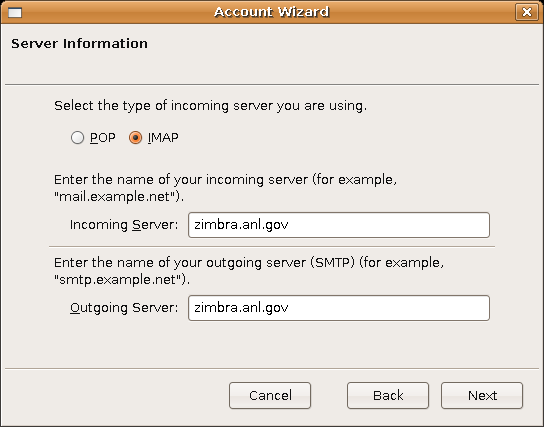
- Choose IMAP and specify zimbra.it.anl.gov as your Incoming Server and Outgoing Server, then choose Next.
- Specify your full Zimbra email address as your Incoming User Name. Note: you will need to include the @domain part, which may vary based on your division. In this example, Brian uses finley@zimbra.it.anl.gov, which is appropriate for his division. Choose Next.

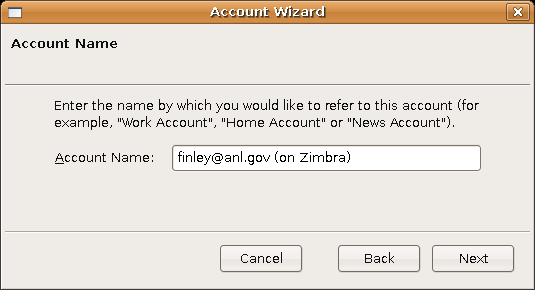
- Enter an "Account Name". This is anything you want to name this account. Choose Next.
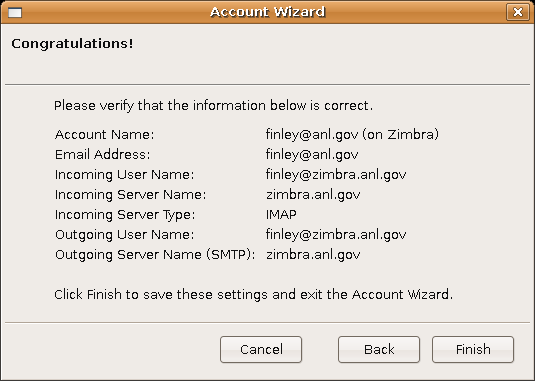
- Verify your settings, and choose Finish.


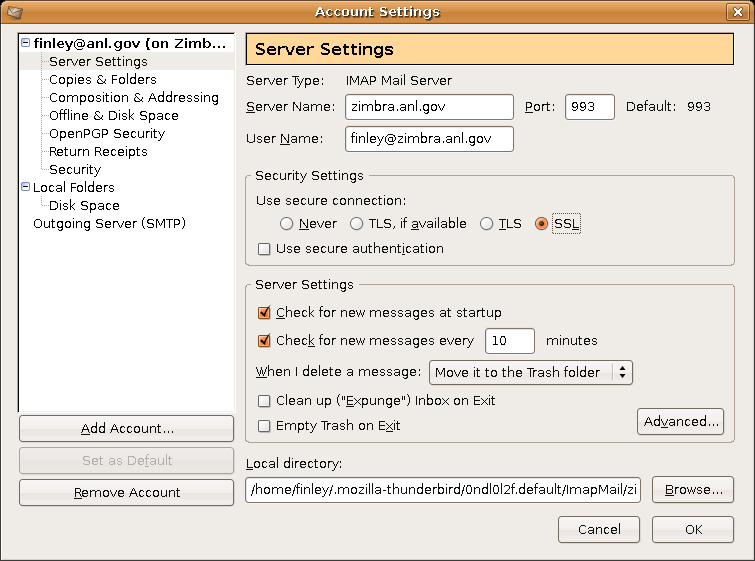
Edit Your Security Settings
- From the "Account Settings" dialog box, choose Server Settings for your account. In the "Security Settings" section, choose SSL.
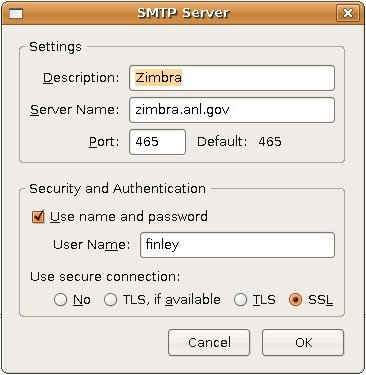
- While still in the "Account Settings" dialog box, choose Outgoing Server (SMTP). Select the entry associated with your new account, and choose Edit....
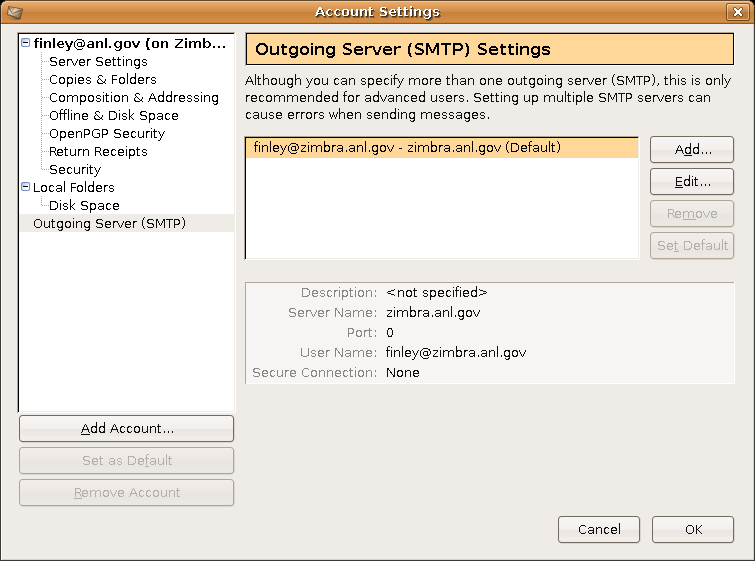
- For the "Use secure connection:" option, choose SSL, then verify that the "Port:" is set to 465. Now click OK, and OK again.
 ]
]


