Email Services/Zimbra User Documentation/Android 2.x: Difference between revisions
Jump to navigation
Jump to search
No edit summary |
|||
| Line 4: | Line 4: | ||
== Visual HOWTO == | == Visual HOWTO == | ||
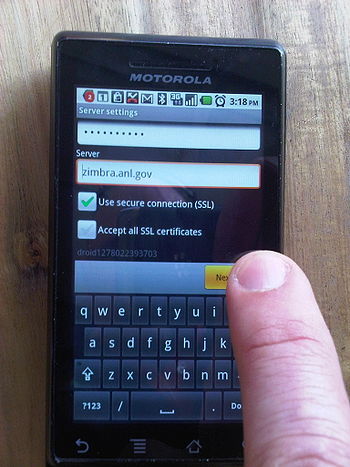
{| | {| | ||
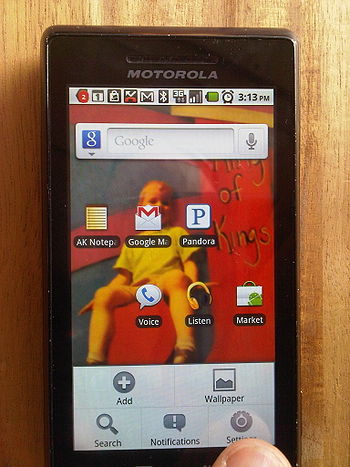
| [[Image:Android 2.2-1.jpg|thumb|350px|upright|1) Click on "Settings"]] | | [[Image:Android 2.2-1.jpg|thumb|350px|upright|1) Click on "Menu", then "Settings"]] | ||
| [[Image:Android 2.2-2.jpg|thumb|350px|upright|2) Click on "Accounts & | | [[Image:Android 2.2-2.jpg|thumb|350px|upright|2) Click on "Accounts & sync", then "Add account"]] | ||
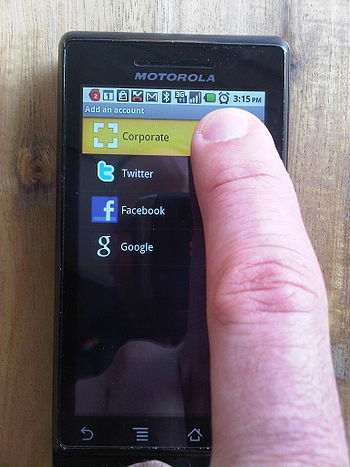
| [[Image:Android 2.2-3.jpg|thumb|350px|upright|3) Click on "Corporate"]] | | [[Image:Android 2.2-3.jpg|thumb|350px|upright|3) Click on "Corporate"]] | ||
|} | |} | ||
{| | {| | ||
| [[Image:Android 2.2-4.jpg|thumb|350px|upright|4) Enter your Zimbra username and password then click "Next" | | [[Image:Android 2.2-4.jpg|thumb|350px|upright|4) Enter your Zimbra username and password then click "Next"]] | ||
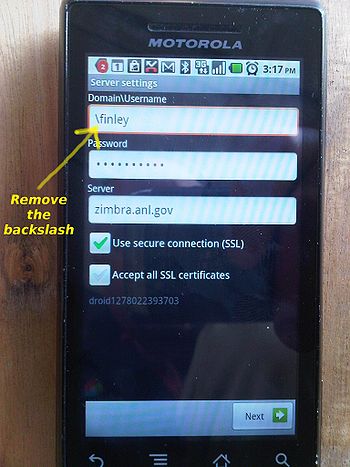
| [[Image:Android 2.2-5.jpg|thumb|350px|upright|5) Remove the backslash ("\") that is automatically added to your username | | [[Image:Android 2.2-5.jpg|thumb|350px|upright|5) Remove the backslash ("\") that is automatically added to your username]] | ||
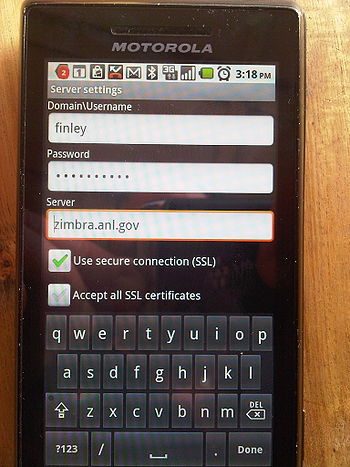
| [[Image:Android 2.2-6.jpg|thumb|350px|upright|6) ''(Photo showing backslash removed)'']] | | [[Image:Android 2.2-6.jpg|thumb|350px|upright|6) ''(Photo showing backslash removed)'']] | ||
|} | |} | ||
{| | {| | ||
| [[Image:Android 2.2-7.jpg|thumb|350px|upright|7) Click "Next" | | [[Image:Android 2.2-7.jpg|thumb|350px|upright|7) Click "Next"]] | ||
| [[Image:Android 2.2-8.jpg|thumb|350px|upright|8) Accept the defaults and click "Next" again. You're done!]] | | [[Image:Android 2.2-8.jpg|thumb|350px|upright|8) Accept the defaults and click "Next" again. You're done!]] | ||
|} | |} | ||
Revision as of 23:41, November 15, 2010
Quick Notes
Android 2.x works great with Zimbra. Email is push-style. Calendar sync works great. Contacts work great and can be presented as a single view of contacts across the Zimbra account and multiple Gmail accounts.
